How to Take Safari Pictures Like a Pro
You already know that when it comes to packing for your safari tour, bringing a camera is a must.
It’s a once-in-a-lifetime opportunity to see wildlife in its natural habitat, not to mention to bring back photos that will make your friends jealous.
But if you want to take great pictures, remembering to bring your camera is only the first step. Read on for tips on how to take safari pictures like a pro.
Choose the Right Trip
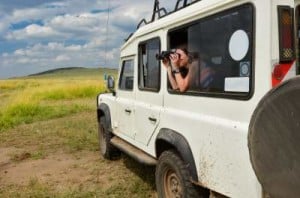
You won’t have much opportunity for pictures if you’re in a crowded group on a bus. If photos are a priority, choose a trip that will allow you to have good visibility while on the tour.
There are even trips that are specifically made to be ideal for those looking to take great pictures. Talk to your tour guide in advance so they know that one of your priorities will be to get good shots.
Bring a Long Lens
You (hopefully) won’t be getting too close to the wildlife, so a long lens is a must.
If you have a professional camera, you should buy or rent at least a 200mm, or telephoto, lens.
The reason? When you’re focusing on one subject that’s far away, like a wild animal, you want to have a long focal length so you can narrow the angle of view and avoid a wide perspective.
A long lens also means that you won’t have to get close enough for an animal to know that you’re there and move.
Just make sure you have steady hands: telephoto lenses are more susceptible to shaking. Something to stabilize the camera lens is helpful, like a tripod, bean bag, or a window mount for a car.
You won’t have to get close to dangerous animals, but when your friends see your pictures, it will certainly look like you did.

Bring a Wide-Angle Lens, Too
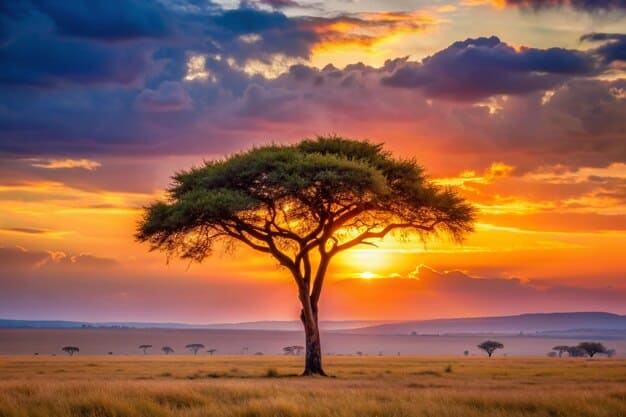
Of course, you won’t just be focusing on wildlife the whole time. A wide-angle lens will help you take beautiful shots of the landscape instead of zooming in on individual animals.
If you’re dedicated to taking incredible safari pictures, packing both a long lens and a wide one will give you the freedom to switch between detailed pictures of animals and wide photos of landscapes.
Shorten the Exposure Time
Your subjects will (again, hopefully) be far away and may be gone within a fraction of a second. They can run away, or a blink-and-you-miss-it moment like a yawn can be over before you have time to click your camera.
That means your exposure time should be short as well.
A good rule to remember is to make the exposure time one over the focal length, in seconds. That means a 200mm lens should have a 1/200 second exposure time to avoid blurring.
With a short exposure time, a photo of a lion in mid-run won’t look like a blur in your picture, even if that’s what it looked like in person.
Compose Your Photos in Real Time
Photoshop and Instagram filters may be popular, but they can’t fix a photo that’s just poorly composed. You’re better off making sure you frame and execute your photo as you take it.
For one thing, you may be tempted to have every animal you shoot right in the center of your photo, but this won’t make for a very interesting set of safari pictures.
Use the Rule of Thirds principle to take more engaging photos. This means when you are taking your picture, you should make sure the subject of the photo is just off to the side horizontally and vertically from the center.
Also, remember to focus on the subject’s eyes: this is the main focus of the subject, and it should be the main subject of your photo. You might also be able to catch a photo of the animal looking right at you.
Don’t forget the rest of your image, either. Objects around the subject or in the corners can distract from the purpose of your image.
No Flashing
Not only is a flash not necessary, it can disturb the wildlife. Remember to look at your light source, and do your best to put yourself between the sun and the subject for the best lighting situation.
If you’re taking safari pictures at night, use a longer exposure to capture more light. Remember that night safari pictures can make for some great shots, even without a flash.
Work Your Settings
The lens, exposure, and composition are not the only things you can control to improve your photos. Play with some of your camera’s settings in order to optimize your images.
For example, white balance helps you make sure well-lit objects don’t appear white. Setting your white balance to daylight will help make sure your subjects appear in full color.
You can also set your color setting to vivid to make sure the colors appear in full force.
No Professional Camera? Get the Most Without One
If you don’t have a professional-grade camera and a nice one isn’t in your budget, there are several options for smaller, more affordable compact digital cameras that are good for travel.
And if getting a camera isn’t in your budget or you forgot to pack one, your phone can still be used to take beautiful safari pictures.
For one thing, you can turn on the gridlines to help you compose your images, and tap on the screen to make sure you focus on your subject.
The downside to a phone is that you should avoid zooming in, as this causes photos to appear grainy. You may have to sacrifice nearness to your subject, or try to get closer to get a better shot. Of course, you can also just crop the picture later.
You can also get an external lens for your phone that will help you take better phone photos without weighing down your luggage or cutting into your budget.
Play with your phone’s camera settings: depending on what you have, you may have options to make pretty pictures without a real camera.
If you find that the settings aren’t enough, you can get an image-editing app that will help you make adjustments after you take a photo. You can also download a camera app that will give you more options than the one that came with your phone.
Plan Ahead for Better Safari Pictures
Don’t show up on safari with a brand new camera or a phone that you don’t know how to use.
Reading the manual and practice with your camera in advance. You can even practice beforehand by going to your local zoo or taking pictures of animals in your neighborhood.
If you downloaded apps or bought a new lens for your phone, you should familiarize yourself with these before leaving for your trip. Know how to use them before you have to use them.
Finally, knowing what you can expect from your safari tour can help you plan for photography. Pay attention to your tour guide so you know what to look out for during a tour.
What are you hoping to capture on your safari tour? Let us know in the comments!


